Stitches and Seams – Finishing The Dress

As I work on my dress again and I am to the point where I am ready to stitch the pieces together. This is the point where I had to set up my sewing machine again since it was packed away during my move.  I thought that this was a perfect moment to document my learning so far by including a short video of me preparing the sewing machine once again. (I am proud that I have the system down to a science).

During my move, I misplaced my tripod, so I had to enlist the help of my roommate for videotaping the following pieces. Before starting to sew my dress I had to choose what type of stich that I wanted to use. I decided on a straight stitch followed by a zigzag stitch. Once I was done my stitches, I unpinned my material and put the pins away. I am very excited because I can see the basic shape of my dress. All that is left to complete this is finishing edging around the arms and at the bottom of the dress.

To finish my dress, I had three things left to do: 1) pin and sew the bottom of my dress so that It looked nice and was custom to my height, 2) pin and sew around the neck and arm holes to make the dress look polished, and 3) try on the dress and admire my work.

While I was finishing the bottom of the dress, I had to enlist the help of my roommate again to help keep the pinning straight. After I pinned to bottom edge, I sewed and cut the excess material off. When this was completed, I moved on to the neck and arm holes on the dress. I used my eye as a guide to measure the seams, and I feel that I did a great job. When my dress was completed, I cut off any excess strings and then tried on the dress. I love it so much, that I have decided that I am going to wear it to my last day of ECMP class in which we are gathering in person. Below is a picture of my completed dress to which I am very proud of and I can now say that I completed by goal of sewing a dress. IMG_0839

Never Enough Pins!

Before I started to make my physical dress, I searched up on YouTube how to cut out patterns. I learnt that weights or pins were great for ensuring that you cut out a proper pattern.
IMG_0804
IMG_0805From here I took my pattern out of the package and cut it to my desires. I followed the size 8 dress size to make sure my dress would be made to my size. When the two pieces for my dress were cut out, I was confused as to how this pattern would create a dress. I stopped for a break at this time while I had a snack and thought about it. I felt embarrassed when I realized the answer because it was so easy to see. I ended up laying my fabric out on my working surface and folded over one edge so I had an overlap, the size of the patter.IMG_0807 IMG_0806IMG_0808

Next I laid my patter on the fabric and made sure that I placed it as close to the edge as I could to avoid wasting fabric. I pinned my pattern for the front of the dress down to both layers of the fabric. Next I took scissors and cut out the material on three sides. I did not cut the rolled overlay side of the fabric as this creates a connecting portion of my two pieces. After my piece was cut out, I unpinned the patter from the fabric and set the piece to the side. Following this, I laid out the rest of my material and folded it in half to create the piece of my dress. Like the process from creating the front piece of the dress I pinned the pattern to the material, cut it out, unpinned the material and set the piece aside. This left me with the two pieces that were necessary for creating my dress.IMG_0810

Now it was time to work on the body of my dress. I was ready to start sewing my pieces together; however, I realized that I was unsure which way to lay the dress so my seams would be on the inside and not the outside. I thought that my best answer for this question would come from a sewing expert, so I called up my mom. She helped me understand that the two pieces of material needed to be pinned face to face in order for me to be able to sew a hidden stitch. The following video shows my process of going from two pattern pieces to creating the body of the dress, in preparation for stitching it together.

Picking And Choosing… Journey Towards The Dress

For my ECMP 355 final project I chose to learn how to sew. I later decided that the way that I would demonstrate my learning would be through the creation of a dress. One of my hardest decisions through this process was deciding what kind of dress that I wanted to make. I went to Fabricland to look for a pattern and some material. While I was flipping through the pattern book, I came across a maxi dress pattern. I have always wanted to wear a maxi dress; however, due to the proportions of my body these dresses are either too long for me or too wide. I thought that this was a perfect opportunity to make one that fits just right.Pattern Maxi Dress Pattern (Front)After deciding that the maxi pattern was the style of dress that I wanted to create, I set out to the back of the store to find some material. While looking at the back of the pattern, I was slightly puzzled at figuring out the size of dress that would fit me. I must have had a confused look on my face because a sales representative walked up to me and asked if she could help me with anything. I was slightly embarrassed that I couldn’t figure out my size of dress. The nice representative helped me figure out that I wore a size 8 dress and that I needed 1 2/3 yards of material to create my dress. I started to look round for material that I liked.

My common sense kicked in while looking at the pattern as I realized that I would need a stretchy material so that I could get the dress on. I ended up finding a few stretchy pieces of materials that I liked; however, I was unable to decide between two of them. Finally I chose to take both on the basis that I planned to make another dress and further practice my new skill. Once I had a representative cut the material to my desire amount I headed for the front of the store. I was very excited when I approached the till to purchase my fabrics and it turned out both of my materials were 70% off and my pattern was regularly $17.95 and it was on sale form $7.95. I was happy that I found two types of fabrics that I liked and they were on sale.

Costs of learning are always better when you get them at a discounted rate!

Completion Of The Double Layered Square Circle Skirt

The past few weeks have been incredibly busy as November is filled with midterms and assignments in preparation for the end of the semester. In this swarm of activity, I made sure to find time to continue to continue my learning for my learning project. On the other hand, I neglected my duty to post my progress and in doing so, this post will explain the last few weeks of my learning project as a whole.

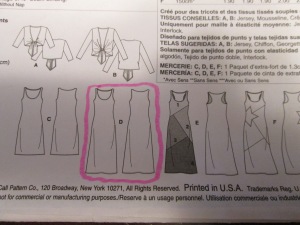
As I am working towards sewing a dress for my learning project, I decided that I should make a smaller project before to give myself practice. I was on Pinterest one day, looking up ideas for beginner sewing projects and I found a few posts on skirts. Each post that I looked at ensured me that skirts are one of the easiest project for beginners working with a sewing machine. When I tried to decided on a particular style of skirt, I found a pattern to create a square circle skirt. Looking through the instructions and the information on this link, I noticed that the pattern for this skirt contained very few materials and seams. In my search for more information on this style of skirt, I found another instructional website that altered the pattern by making it a double layered square circle skirt.

I started my project by reviewing the instructional website and clarified what materials I needed and how I could break up my project to be able to complete it within my available time in my crazy busy schedule. Once I made a list of materials that I needed, I went out to Wal-Mart and purchases a package of material, along with enough elastic for the waistline and some pins. The picture below displays my collection of materials that I needed for this small project.

Materials Needed
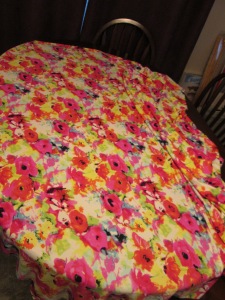
Once I had all of my supplies I unrolled my material and laid it with the pattern facing down on my working surface (my kitchen table).

Green Material Laid Out On Table Bowl and Ruler

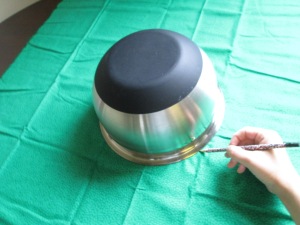
I ran into a bit of a problem. I realized that I did not have a tape measure, so I had to improvise. I use my current belt to wrap around my waist and then I used the ruler (right) to measure how big my waist was. I then found a bowl that measured approximately the same circumference as my waist. From here I found the center of the material and placed the bowl upside down in the center.  I used the ruler to double check that the bowl was in the middle.  After this, I used a pencil to trace around the bowl on the material.IMG_0768IMG_0767

IMG_0770

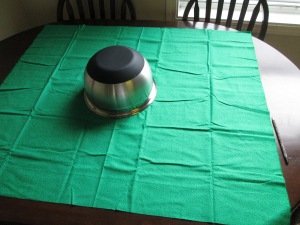
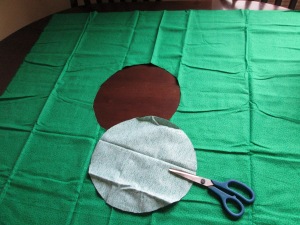
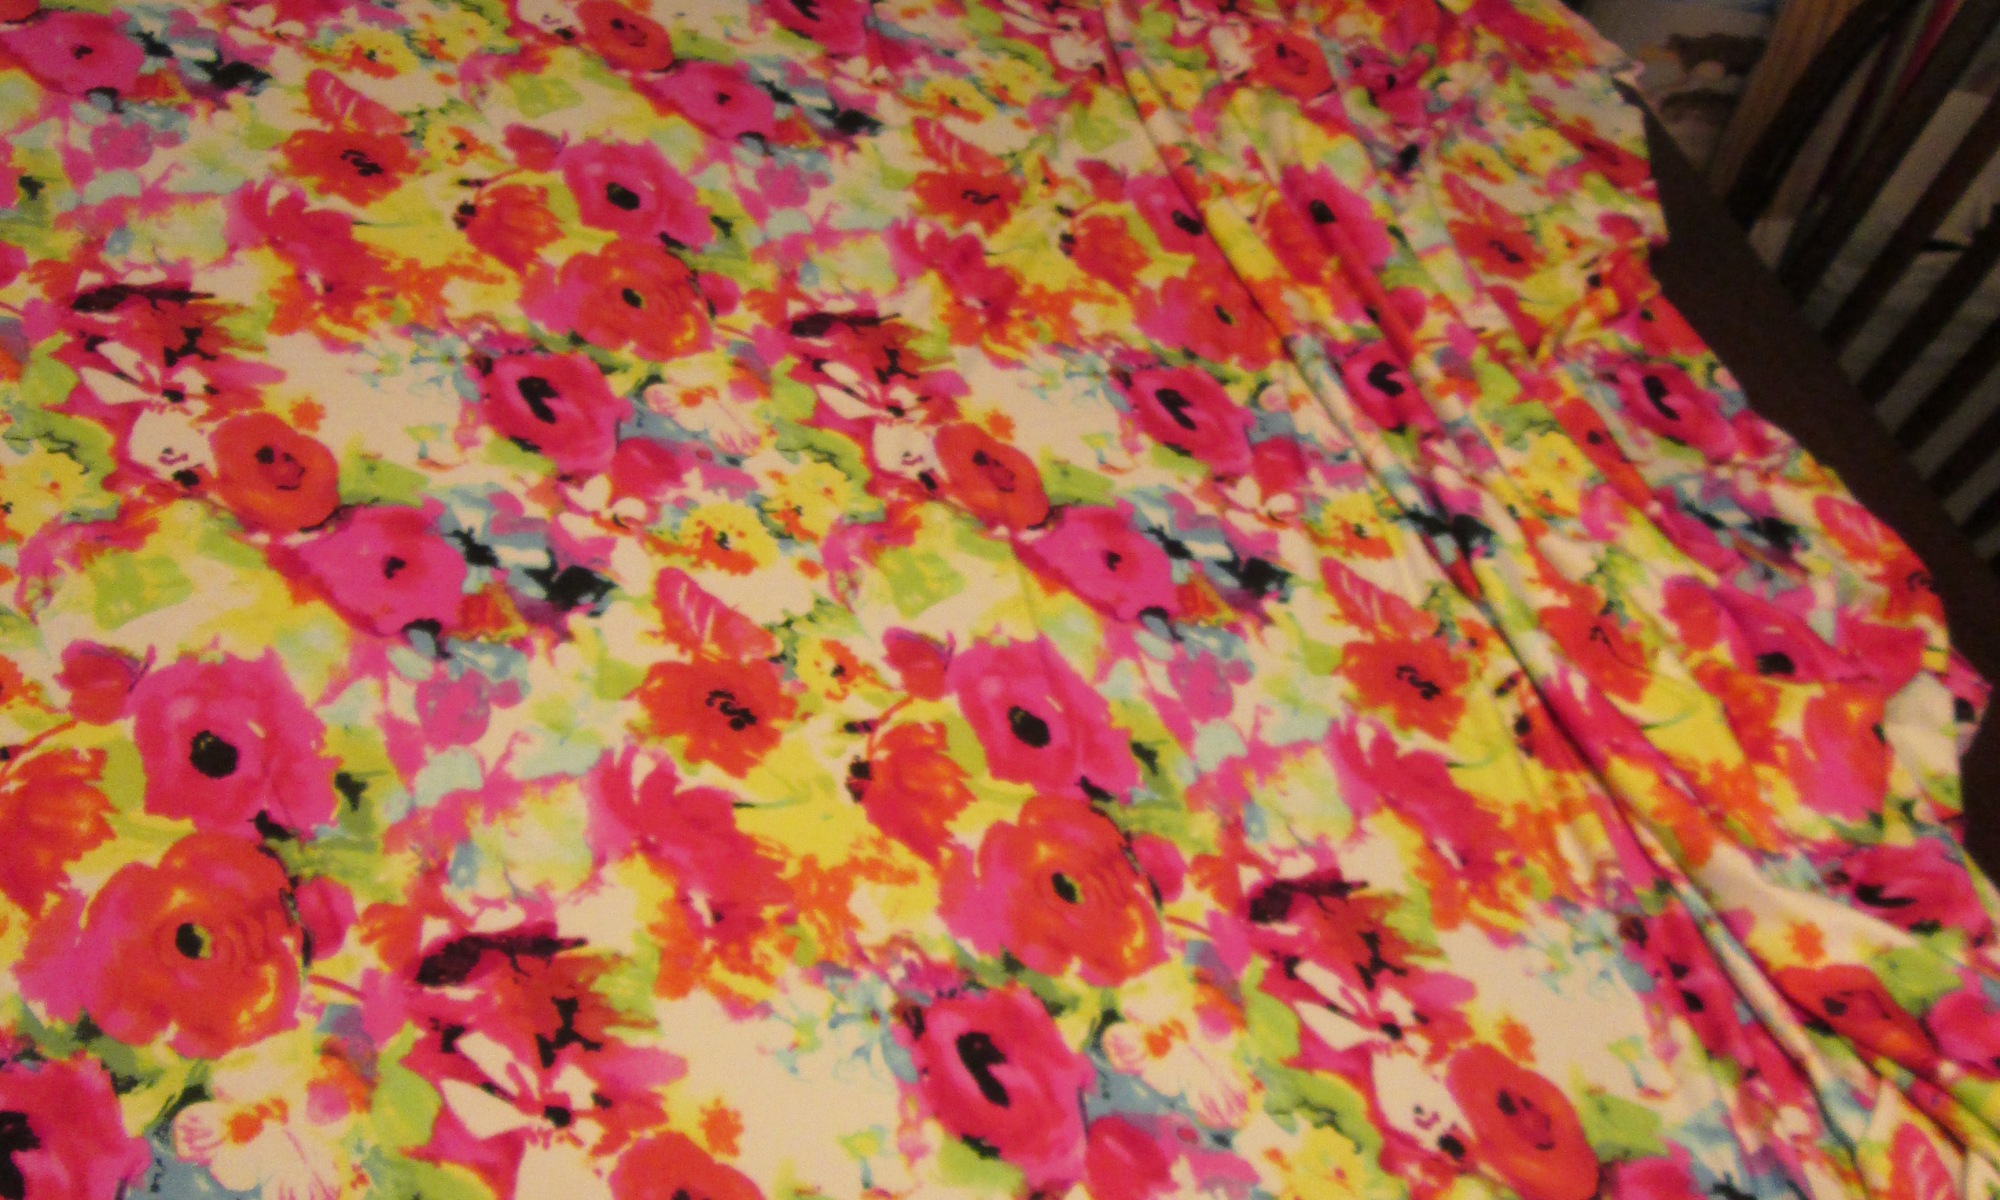
After this, I took my material and cut out the circle that I had drawn. Once this was completed, I set that piece of material aside and laid out my second piece of material. I followed the same steps with the second piece. After laying out the material, I placed the bowl in the middle and traced around it. Finally I cut out the traced circle. The pictures below demonstrate my steps.

IMG_0773IMG_0771

Once these steps were finished I took  the first layer and the second layer and laid them on top of each other on the table. I laid the second layer on a 45 degree angle. IMG_0774As the picture to the right shows, I made sure that the cut out circles in the middle lined up with one another. Once the edged were lined up, I used pins to hold the material together. IMG_0777
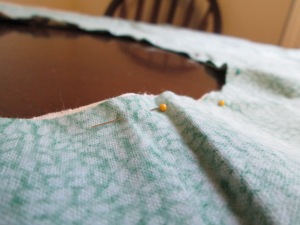
From here I grabbed my piece of elastic and cut it to fit around my waist plus half and inch on either side for overlap. IMG_0779I then pinned the elastic ends together with approximately a half an inch overlap to create a circle  and then sewed the elastic. Once I had my elastic circle I placed the elastic in the middle of the cutout and then used pins to attach the elastic to the material with a slight overlap. I founded a instructional site that helped me further understand how to attach the elastic to the material properly.


Through this process I learnt that the pins work better if they are placed on an angle so that the sewing machine does not catch on them when you are sewing. I used a straight stitch at first to IMG_0782
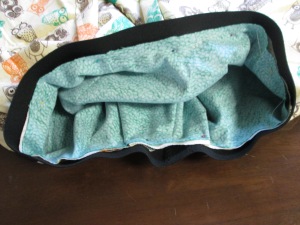
hold the elastic to the material and then I used a honeycomb stitch after. while I was writing this blog, I knew what the stitch looked like, however I did not know the name of it, but I found it one the Singer Website. I now had my basic skirt. I tried it on to make sure that it would fit.

When I was done the body of my skirt, I wanted to make the edges look nice. FullSizeRender (1)
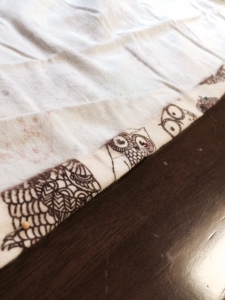
So I put my skirt on my table upside down and spread out one layer at a FullSizeRender
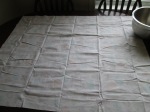
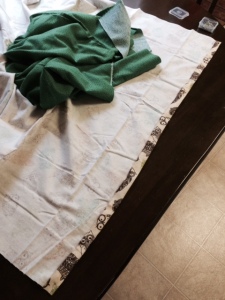
time to fold over, pin and sew the edges of the skirt. The following pictures show my edging and my final skirt.  When this was done, I had create a fun, cute skirt that I made all on my own.

This was a great experience to create my own skirt from scratch. I think that it was a great idea to create a smaller project before starting my dress.I learnt many new things during this process that will benefit my process of creating a dress.

FullSizeRender (3)rsz_img_0800 Learning is fun!

Meet Thelma..

Thelma is a new arrival to my family. For those who are wondering, Thelma is my sewing machine. She was place on my mighty craft table only a few short weeks a go and so far she has been a wonder. As I mentioned in a previous post, I have always wanted to learn how to use a sewing machine. This is one of the many reasons why I am excited to have Thelma in my life.

Looking at my project to learn how to sew, I knew that once I had acquired a sewing machine, like Thelma, I would need to learn how to run her. This was a great opportunity as I found great resources on YouTube that allowed me to get a basic understanding of the main components or parts of the sewing machine and how to thread and get my sewing machine set up. First and for most, I looked up the parts of a sewing machine. I am vaguely familiar with a sewing machine as I took part in home economics in high school; however, I spent very little time working with the sewing machine. This meant that I needed a refresher. I found a great site that was entitled the Anatomy of a Sewing Machine. This website has a labelled diagram with detailed descriptions about each part of the machine. After I had pulled Thelma out of the box and got her set up, I needed a refresher on how to thread the machine.  I searched on YouTube how to thread the machine  and I found a great videos by Youtuber FilmedCoUk which has great instructional videos for how to do a variety of tasks. The first video that I looked at was the Start Sewing Video. This video was very helpful.

Once my machine was threaded, I used a scrap piece of material that I had and tried using a few different stitches on my machine. The following video is a quick view of me threading and practicing working with Thelma. I would like to quickly point out that this is the evidence of my practice of threading an preparing the machine.

Now this video was short, but those hands in the video are mine as I worked to set up the machine. So far during this learning project, I have been fairly lucky with the difficulty of my project; however, I know that as I move forth in my project to create a skirt and then a dress that things will become more difficult.

Expanding My Horizons Through Learning

Growing up I always watched my mom hem and alter all sorts of outfits and items. I always found it intriguing to watch her take something that was torn and ripped and mend it so it looks almost new again. The idea of sewing never truly crossed my mind until I was posed with  the choice to do a learning project as a final project, I was very excited. My first reaction was that I wanted to make duct tape suit. The reasoning behind this is that I create and sell my own duct tape creations. I soon realized that this option would not be plausible for two reasons. First, I already know how to create patterns and object in duct tape therefore it would take time, but I would not be attempting a new skills. Secondly, I realized that I needed to use outside sources to help guide my learning. I knew that I would not use outside sources to teach myself to make a duct tape suit because I have a policy that my designs come from my head.

So once I realized that duct tape was not an answer I knew that I had to think outside the box, what was something that I always wanted to learn, but I never had to chance to. I was brought to the thought of my mom mending hemming clothing. I decided that I was going to teach myself to sew. I was unsure about what I was going to sew, so I decided I needed to start with the basics first. This means, trying to understand a sewing machine.